Build Robust User-Centric DApps Faster with Terminal and Torus.
Terminal is an essential developer tool for anyone building on the Ethereum network. Its unified workspace allows developers to develop, test, and manage Ethereum artifacts and infrastructure.
Developers no longer have to spend their production time to build out their own backend tracking tools and can rely on Terminal’s toolkit for a broad range of utilities to construct robust user-centric DApps instead.
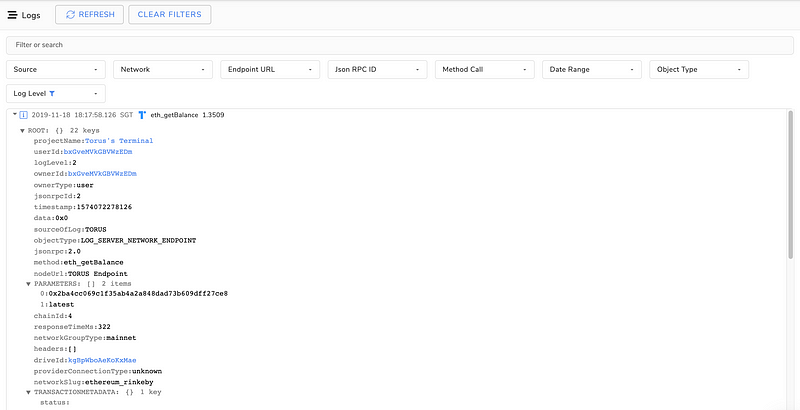
A crucial platform for anyone pushing their decentralised application towards a proficient state of production, Terminal provides developers with real-time DApp logs and lets them identify the impact of specific problems to prioritize bug fixes accordingly.
Terminal’s infrastructure analytics provides developers with macro views of all requests logged, with filters at various levels from the source down to specific Json RPC endpoints. This is useful for developers looking to analyze any points of friction throughout user experience to optimise their application uptime.

Terminal supports Torus out of the box, and developers can utilize familiar Web2.0 tools to build out their decentralised application with. Terminal’s launch is a vital contribution to the DApp developer ecosystem as we collectively bring the best practices of Web2.0 to accelerate the development of useful blockchain applications for mainstream audiences.
Quick and Simple Integration with Terminal and Torus
Integrating Torus with Terminal with your DApp is a simple engineering process that can be accomplished within a day.
Wrap Terminal and Torus with your Web3 instance to start surfacing logs in 3 simple steps:
Step 1: Install the Terminal SDK via their npm package.npm i @terminal-packages/sdk
Step 2: Register for a Terminal account and generate your Terminal API Key.
Registration for a new terminal account is simple when using your existing GitHub account.
Step 3: Wrap the Torus provider by importing the Terminal SDK package and including the Terminal API Key, Terminal ProjectID, Source, and Provider.import Torus from "@toruslabs/torus-embed";
import {TerminalHttpProvider, Web3Versions} from '@terminal-packages/sdk';const torus = new Torus();
await torus.init();
await torus.login();const web3 = new Web3(
new TerminalHttpProvider({
customHttpProvider: torus.provider,
apiKey: "YOUR_TERMINAL_API_KEY",
source: "TORUS",
projectId: "YOUR_TERMINAL_PROJECTID",
web3Version: Web3Versions.one
})
);
When integrating Terminal, take note of your apiKey which is your Terminal API Key, and the projectID, which is the unique identifier associated with your Terminal project, this can be retrieved from your Terminal project settings on the dashboard.
Terminal also provides support for multiple wallet providers with your DApp, and you would need to wrap each web3 instance and segment your application by each source type accordingly. A more in-depth guide can be found on Terminal’s documentation site.
Once the Web3 instances are wrapped inside the Terminal SDK, all Web3 interactions will be logged into your terminal account. From here onwards, you can start developing your DApp alongside real-time logs to identify, track and prioritize bugs to assist your engineering and application development.
Reach Out to Us
Now that you’ve integrated Terminal, you are well equipped to build out your next big DApp!
Check out our documentation page for more information on building with Torus and share your developing experiences with us on Telegram or Twitter!


